Sauces | Salads & Such | Soups & More | Jellies | Drinks | Cooking School
|
Get Home |
Desserts |
Breads |
Cajun |
Mexican |
Italian |
Meat Dishes |
Casseroles |
Veggies Sauces | Salads & Such | Soups & More | Jellies | Drinks | Cooking School | |||
| Bread Making 101 | ||
 |
 |
 |
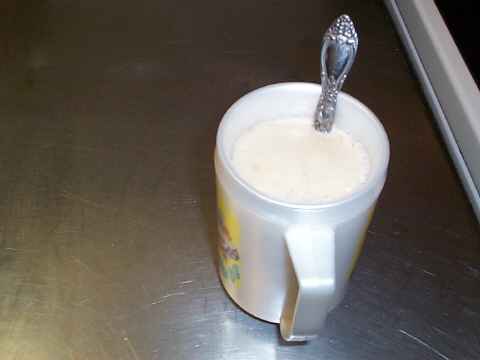
| We begin our bread making by putting our basic ingredients (shortening, eggs, salt, etc) into the mixer. If you do not have a mixer just combine your ingredients in a large mixing bowl. When using a mixer the kneeding of the dough is done in the mixer. Without a mixer the dough kneeding is done by hand. We will get to that later. Our next step is to prepare our yeast. The method I use will guarantee that the yeast is active before putting it in the dough mixture. Use 1 cup of hot tap water (about 100 degrees). You must be careful not to exceed this temperature as it will kill the yeast. Most of the bread recipes will require 1/8 cup (2 tablespoons) or 3 packets of yeast. Put the yeast and 1 tablespoon of sugar into a large cup or glass. Now add the 1 cup of hot tap water, mixing as you add the water. Set aside and you should see the yeast begin to activate (begin bubbling) in a few minutes. If you do not get this result, get some fresh yeast and try again. | ||
 |
 |
 |
|
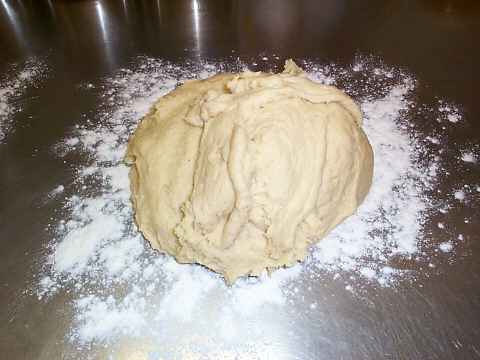
Start by adding 2 cups of flour to your basic ingredients. Now add the activated yeast mixture. Mix in mixer or by hand. Continue adding flour a cup at a time, mixing after each addition. When the dough balls on the dough hook and does not run back to bottom of bowl it is ready. The way I test my dough is just to lightly touch it with my dry finger tip. If the dough sticks to your finger it needs more flour. If a light touch does not stick to your finger the dough is ready to turnout on the work table. Turn the dough out of the mixer or mixing bowl on a lightly floured work surface. | ||
 |
 |
 |
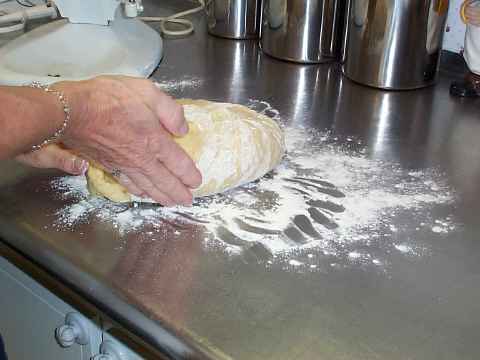
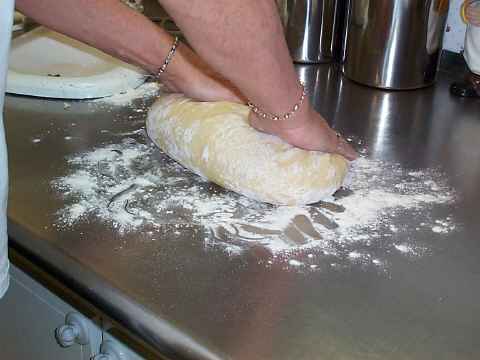
| If you mixed the dough in a mixer most of the kneeding has been done. All that is required is to kneed just enough to form into a ball. If mixing by hand was used, it will require about 15 minutes of kneeding by hand. To properly kneed the dough, form it into a ball, then press down in the center with the heel of your hands. After each press take the dough and fold it over it's self. Continue this process of pressing and folding, rotating the dough as you go. Do this for about 15 minutes | ||
 |
 |
 |
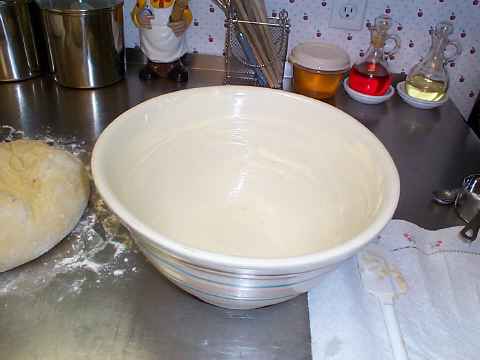
| Brush a large bowl with melted butter. Place the dough in the buttered bowl and and brush the top with melted butter. Let rise until it has doubled in size. The dough in the middle picture has just been added to the rising bowl. Rising time will vary with temperature and humidity, but it will take between 1 and 2 hours to double in size. Cover the bowl with a towel while dough is rising. | ||
 |
 |
 |
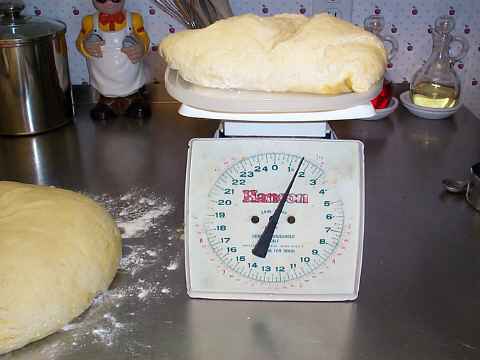
| Cut a piece of dough that weighs 24 ounces. Take this 24 ounce piece and form into a ball. Take the 24 ounce ball and place on a lightly floured surface and use a rolling pin to shape into a rectangle about 8 inches by 10 inches. Fold in all four sides. | ||
 |
 |
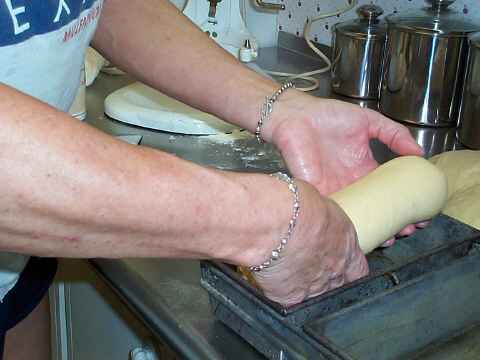 |
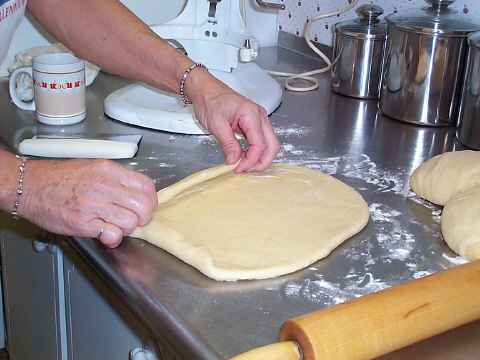
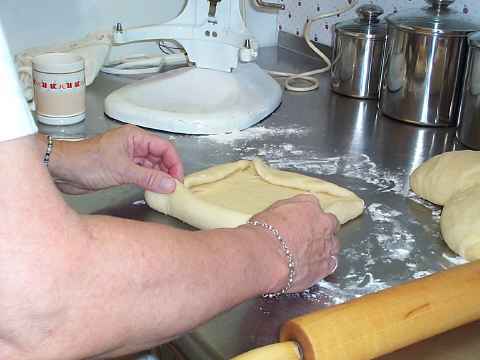
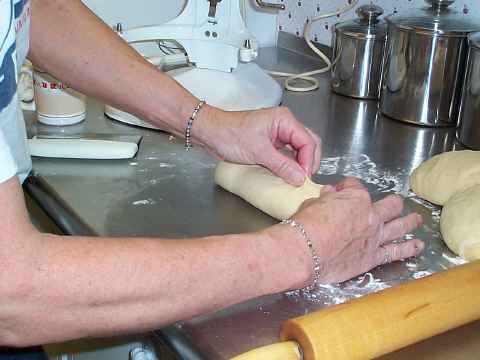
| Roll the rectangle, with the sides folded in, into a loaf shape. Take your fingers and pinch the dough along the seams to seal them. Do the same thing on each end. When finished we want a nice smooth, seamless roll of dough. Place the rolled bread loaf into the baking pan that has been brushed with melted butter. Brush the top of the loaf with melted butter. | ||
 |
 |
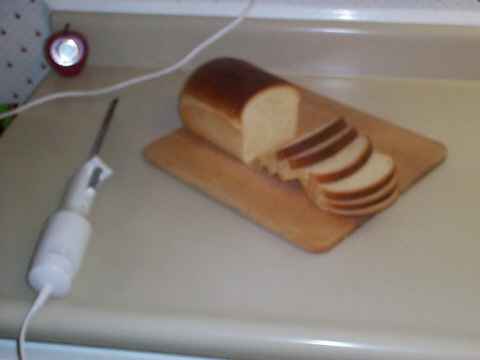 |
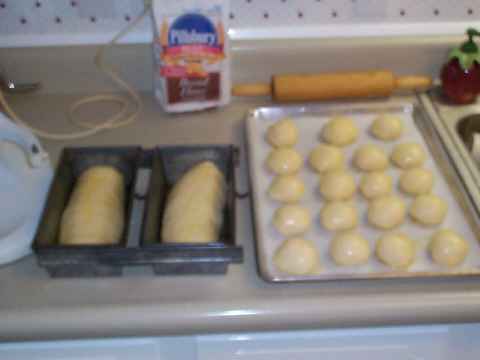
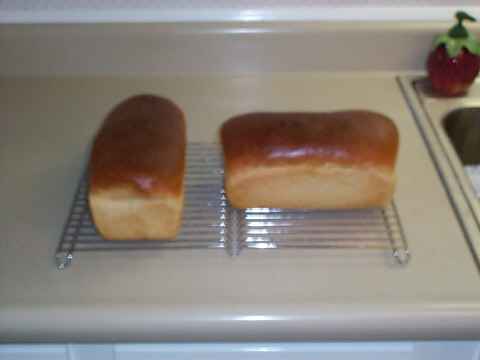
| Leave the bread pans uncovered and let rise until the dough has doubled in size. After the bread has doubled, place it in a 350 degree oven, and bake for 40 to 50 minutes. The bread should have a rich brown color when ready. Remove bread from baking pan and place on a wire rack. Brush the top with melted butter. Let the bread cool completely on wire racks when removed from oven. When completely cooled slice to desired thickness. I use and electric knife, which makes it much easier to slice. Any extra bread may be stored in the freezer until needed. Back to Cooking Class Menu Back to Bread Menu Good Eats Home Page | ||